
In January 2021, Tailwind debuted with Tailwind Create. Tailwind Create is the easy way to create and generate pins images for bloggers like us! In today’s post, I’m going to walk you through a step-by-step of how I use Tailwind Create to make designs for my other blog about affordable and low carb recipes, The Tiny Twenty-Something. I will also be covering the basic introduction of Tailwind for Pinterest and a step-by-step for making your own Design for Tailwind Create.
**Disclosure: this post may contain affiliated links- this means that I may earn a commission from the products I promote if you choose to buy them using these links at no additional cost to you. Read full disclosure here. I was also compensated to create a post about my experience with Tailwind Create, however these thoughts are my own.
What is Tailwind & What Can it do for Your Pinterest?
Tailwind is a scheduling platform used to schedule your posts or pins for Instagram or Pinterest. During your free trial, you receive 30 free posts or 100 free pins to be scheduled before moving forward with purchasing an annual or monthly plan. Each plan is $15/month or $119/year per profile. If you want to have 2 social media accounts managed on Tailwind, they can be used in 1 account (ie. you can use 1 email and have 1 dashboard) but they cost per profile. So if you’re starting out and can’t quite yet invest in using Tailwind for both your Instagram and Pinterest, spend some time to decide which would be the better option for you.


What is Tailwind Create?
Tailwind Create is an additional feature for Pinterest where you can design your own pins by doing basically half the work in Tailwind Create. Tailwind offers Pinterest users 4 plans and they range from $0 to $49.92. At the time of me writing this, they are currently offering a 50% discount to new Tailwind Create users for those who might want to upgrade!

I currently use the free plan so that I can save money on business expenses. I post 8 recipes or budget/meal planning posts each month, so I divide the posts among the pins- basically all posts get 2-3, depending on how good my images of the recipes turned out. Be sure to read on below for the step-by-step of making your own Design and scheduling it!
What I like most about Tailwind Create:
- It’s convenient. The option to use it is right in the side bar of my dashboard! All I need to do is fill in a few fields on the first page of Tailwind Create, choose a few designs, write text and assign boards, add to Loops and Communities and then schedule it! (More details below!)
- Gives me Design ideas. As I said above, I am using the Free plan in order to be budget conscious about my business expenses. This means I get 15 free Designs before needing to purchase a plan, wait until next month, or using other tools to create designs.
- It has educated me about the importance on branding and uniformity. Consistent designs, and fresh but similar posting to Pinterest is one of the keys to having success for Pinterest. I learned at an inopportune time the importance of generating similar content and sticking to your niche. A couple months ago I started splitting my Pins and designs between Writing Advice and Recipes, and my stats tanked because of it! If you’re using a Business profile on Pinterest, you need to keep your pins consistent, otherwise it might be considered a personal profile and you won’t get the view you need to generate good traffic through Pinterest.
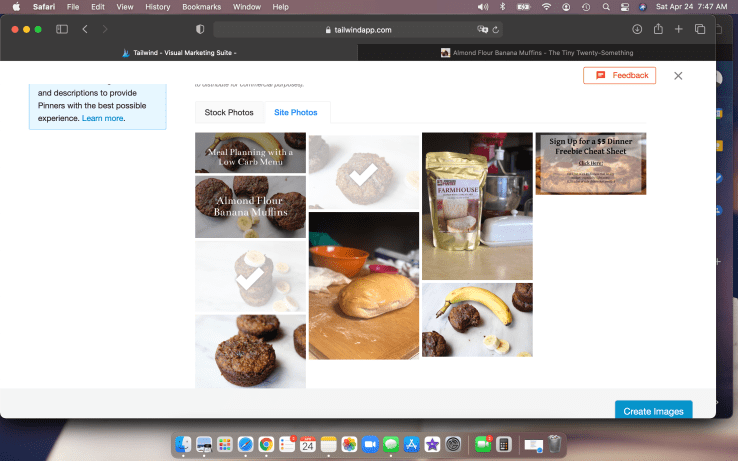
- Access to Stock Images– Everyone loves a good stock image. Especially if you’re not the one who enjoys taking photos, or need 1 to make something extra special. For my current plan, there are plenty of Free stock images that I can choose from, but if you have a paid plan, you have access to much more. (See above image)
How to Make a Design
Tailwind Create is a super easy method to making your own Pins- and it takes half the time! Here is the step-by-step of how I schedule my pins for The Tiny Twenty-Something.
- In your Dashboard, go to Drafts and then click on either the green button that says New! Design in Tailwind Create or Create New Pin and choose the same option.

- Choose which post you want people to be redirected too. Your post title will be automatically filled, and used at the Pin’s text. But you can change that if you want to shake things up- and Pinterest does recommend doing that.

- Next, choose either your photos from the post, your site or choose stock photos.
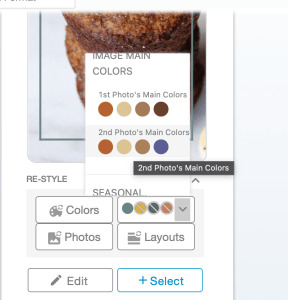
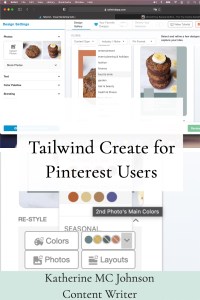
- Tailwind Create will generate several designs for you to choose from. You can even filter out certain designs by chose content type, selecting your Industry/Niche and your Pin Format. If you wish to change your color settings and use colors not chosen in your Brand Preference, you can choose colors that are based on your images’ colors.

- If there is only a tiny detail you want to change- say you love the design but are not a fan of the image for that pin, simply switch out the photo, the color or the layout and Tailwind Create will automatically shuffle things around.


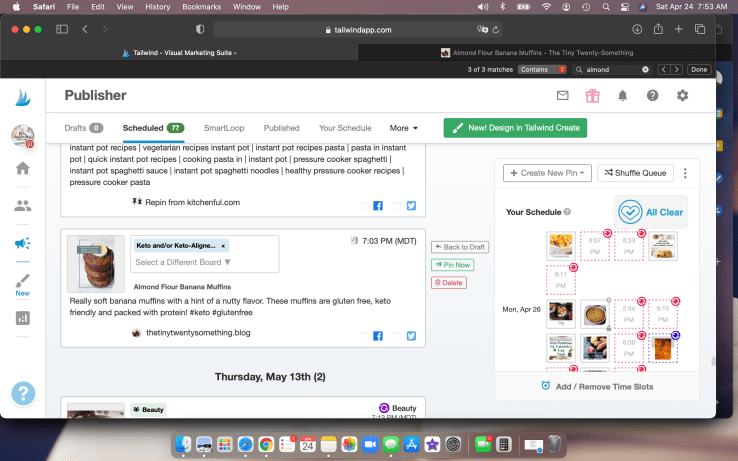
- Next you will need to assign which Board your Pin will be posted to, write up something clever, use hashtags and keywords. Optional and recommended steps: add pins to your Loop(s), and to a relevant Tailwind Community.
Final Thoughts for Tailwind Create for Pinterest Users
In summary, Tailwind Create is an amazing and super easy tool for Pinterest users. It’s definitely worth exploring, and if you have the funds to purchase a paid plan, I say go for it! You receive many more benefits, you can upload more designs, have more pickings from stock images, and more! If you’re ready to get started with Tailwind for Pinterest or Create, click on Pinterest and/or Create to get started.
Save these for Later!


[…] can also get 20 Tailwind Create posts for Instagram and/or Pinterest- as you may recall, I love Tailwind Create for Pinterest Users. That is an additional 20 free posts every […]
LikeLike
[…] Tailwind Create for Pinterest Users […]
LikeLike
[…] also get 20 Tailwind Create posts for Instagram and/or Pinterest- as you may recall, I love Tailwind Create for Pinterest Users. That is an additional 20 free posts every […]
LikeLike
[…] You can also get 20 Tailwind Create posts for Instagram and/or Pinterest- as you may recall, I love Tailwind Create for Pinterest Users. […]
LikeLike
[…] Pinterest as a Writing Resource for YOU Tailwind Create for Pinterest Users […]
LikeLike
[…] Blog Post: Tailwind Create for Pinterest Blog Post: My Favorite Online Writing Tools […]
LikeLike